The benefits of a baseline inspection of new fired heater process tubes
18 April 2024
The vast majority of mechanical cleaning and inspection work we carry out for our oil refinery clients is on commissioned fired heaters. But what about new process tubes? Surely there’s no need to inspect these? In this article we explore the potential consequences of neglecting to carry out baseline inspection, so let’s see!
It is well understood that fired heaters are a critical component in refining. Mechanical failure of process tubing contained within fired heaters can have catastrophic safety, environmental and financial effects.
Seamless tubes are known to be susceptible to various manufacturing tolerances, which can result in deviations from the specified nominal tube dimensions. A ‘baseline’ Intelligent Pig inspection prior to commissioning provides our clients with a thorough evaluation of tube geometry, to which all future inspection data can be usefully compared.
By combining a baseline inspection with further periodic inspections, an accurate corrosion rate can be calculated. Accurate determination of such rates will allow for more precise remaining life assessments.

CASE STUDY
As part of a refinery scheduled maintenance turnaround in 2018, Cokebusters USA was engaged to carry out inspection on the radiant section of an atmospheric crude heater in Texas.
The coils in question were newly commissioned and had not yet entered commercial operation. To obtain a full assessment of tube geometry, an inspection of all process tubes was requested and Cokebusters’ patented Mark IV Intelligent Pig was duly deployed.

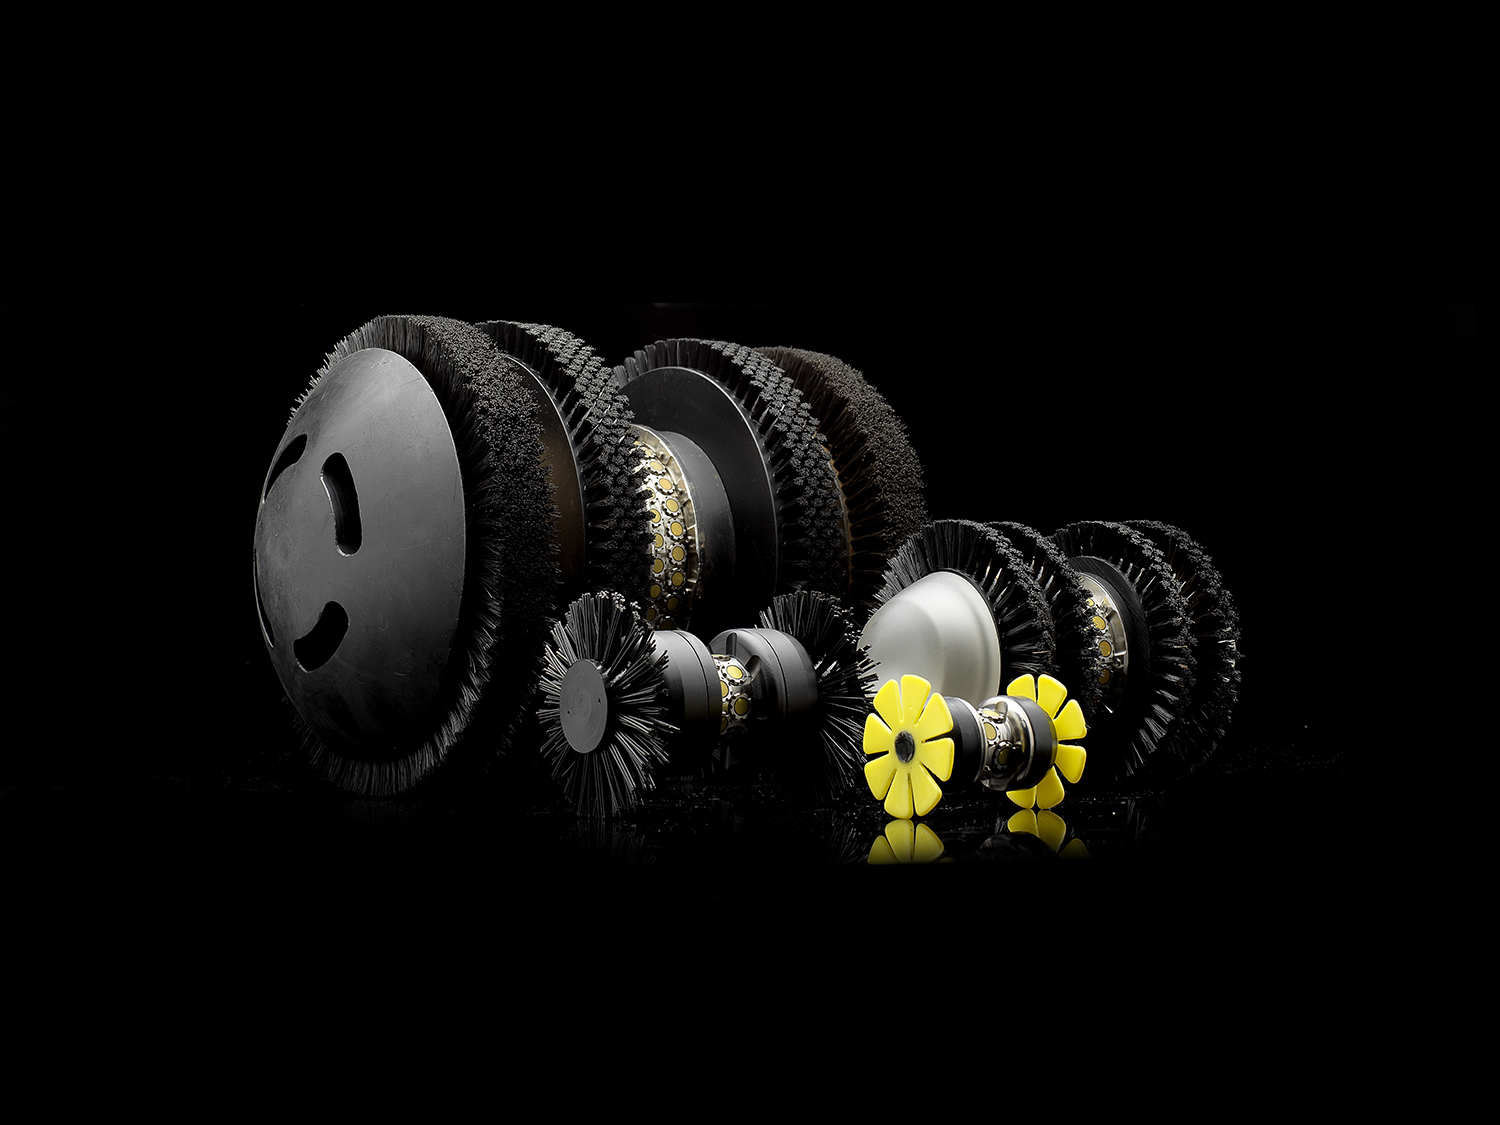
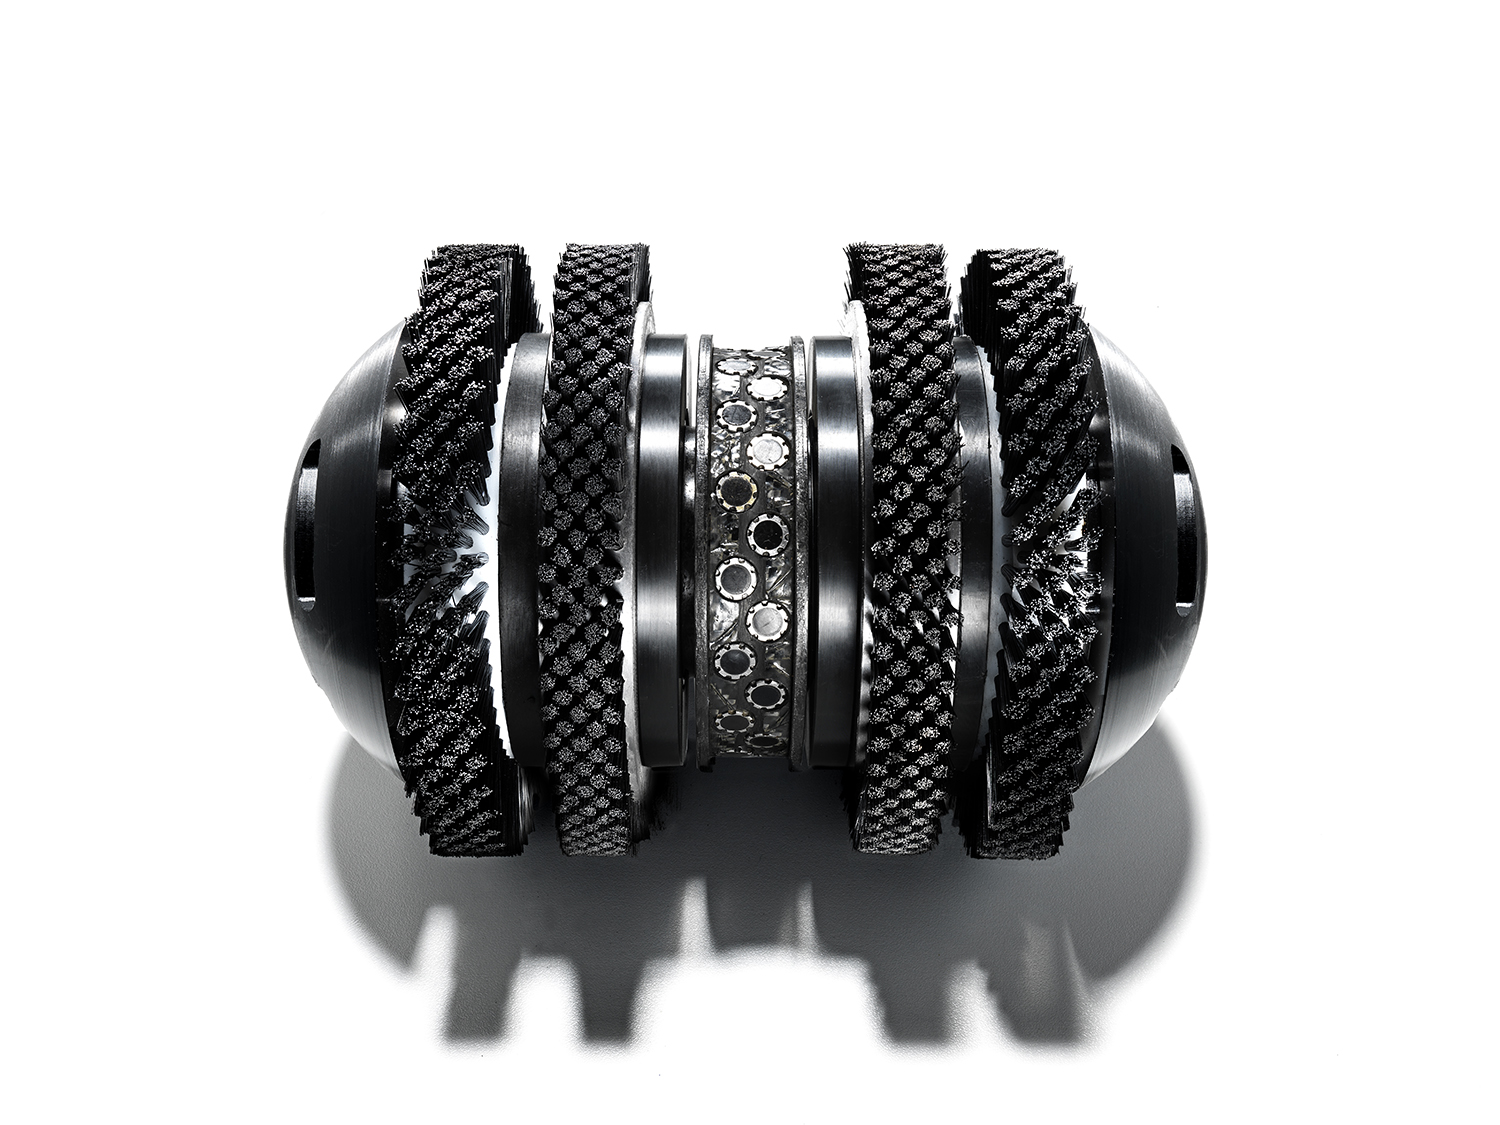
This single bodied, un-tethered inspection device employs a series of ultrasonic transducers to circumferentially measure wall thickness and internal radius along the full length of the heater coil. In doing so it effectively scans the process tubes for geometric abnormalities or defects. The ‘Smart Pig’ records and stores the received data to its on-board memory, which is then uploaded for analysis and post processing. Reporting formats include tabulated data, graphical plots and a customisable 3D reader version of the entire heater coil (C-scan).
In this case multiple inspection runs were carried out in order to confirm and validate data. Over 230,000 individual wall thickness measurements were recorded in each tube.
BASELINE INSPECTION RESULTS

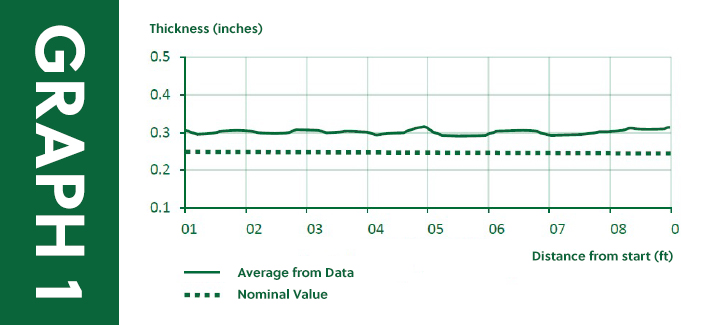
From the data it was clear that the average wall thickness for each replacement tube was in fact significantly higher than the specified nominal values. The specification sheet for these tubes gave dimensions of 4.5”O.D x 0.25”M.W, whereas our data showed that the average wall thickness across all of the tubes was 0.305”. This represented an increase of some 18%.
PROJECTED EFFECTS ON DETERIORATION RATE
These graphical plots demonstrate the effect that carrying out a baseline inspection can have when it comes to assessing the condition of the furnace coils within the heater.

Graph 2 shows the average wall thickness for the coil from three separate inspections carried out over ten years.
Graph 3 demonstrates the same results, except the average wall thickness value obtained from the baseline inspection has been replaced with the specified nominal thickness for the coil at T=0.

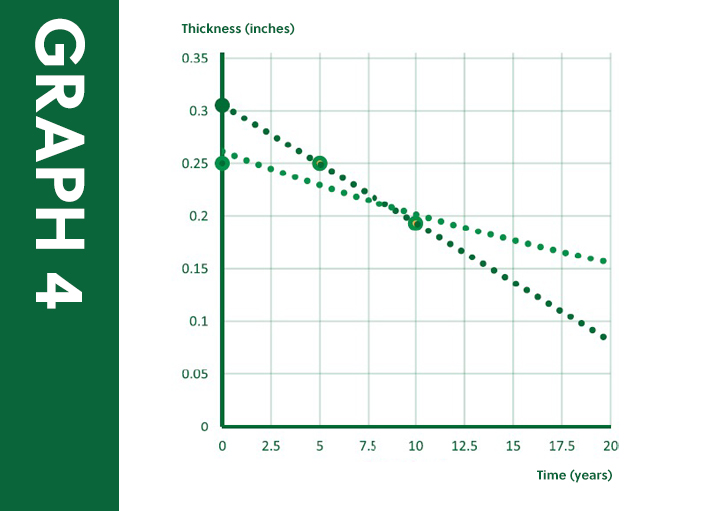
Graph 4 compares the two “best fit” lines, demonstrating the effect a baseline inspection can have on corrosion rates forecasted over 20 years.
With the benefit of the baseline inspection, Graph 2 shows a corrosion rate of 0.011” per year. Where the first inspection was carried out after 5 years of the new coil being in service, Graph 3 shows a corrosion rate of just 0.004” per year. Without baseline inspection the assumption would be made that the coil had not deteriorated from its original condition.
It is only by having the benefit of a baseline inspection it can be seen that, during those five years, the condition of the coil had deteriorated from an average thickness of 0.305”, to 0.25”. This represents a wall loss of 0.055” or 18%.
Equipped with only the data from the 5 year inspection, it is plausible that the decision could have been taken to not carry out another tube inspection after ten years, and instead plan to perform one after fifteen, or even twenty, years.
As Graph 4 illustrates, had the coil continued to deteriorate at the rate it had over the first five years of it being in service, by year 20 the wall thickness would have been as low as 0.08” and the decision to delay further inspections could have had catastrophic results!
CONCLUSION
It is clear that there are multiple benefits to carrying out a baseline inspection prior to process tubes being entered into commercial service:
- Identify any issues or anomalies before coils are commissioned
- Remove any uncertainty caused by mill tolerances during manufacturing process
- Equip engineers with data required to confidently make decisions on maintenance & repair
- Inform and therefore enable the client to implement best inspection schedule going forward
If you would like any further information on the Cokebusters piping inspection service please don’t hesitate to contact us and our experts will be pleased to answer any questions you have!

